Introduction
Hurricane season and rising premiums have made “home hardening” a must-do, not a nice-to-have. The good news: the My Safe Florida Home (MSFH) program helps eligible homeowners start with a free wind-mitigation inspection and, for qualified projects, matching grant funds up to $10,000 . This no-jargon guide walks you through the process—from inspection to reimbursement—so you can strengthen your home and budget with confidence.
What Is the My Safe Florida Home Program?
MSFH is a statewide initiative designed to help homeowners identify vulnerabilities and fund proven wind-mitigation upgrades. In plain terms, you’ll get:
• A free, professional inspection that assesses your home’s wind resistance.
• A custom report prioritizing improvements.
• Access to a matching grant (up to $10,000) for eligible upgrades once your inspection is complete and your application is approved.
Bottom line: stronger homes, fewer storm losses, and potential insurance savings when upgrades meet qualifying standards.
Who’s Eligible (High-Level Overview)
While the program details can evolve, the core concepts stay consistent:
• Home type: Typically owner-occupied, site-built single-family homes and certain townhomes.
• Residency & insurance: You’ll need proof of ownership, homestead/primary residence status, and active homeowners insurance for most grant pathways.
• Priorities: Application windows may prioritize low-income and/or senior households first, followed by broader groups.
• First-come, first-served: Funding is finite, so earlier, complete applications have an advantage.
Tip: Gather your photo ID, proof of ownership, insurance declarations page, and homestead documentation before you apply.
How the Free Wind-Mitigation Inspection Works
An MSFH-authorized inspector evaluates key features that affect your home’s wind performance, such as:
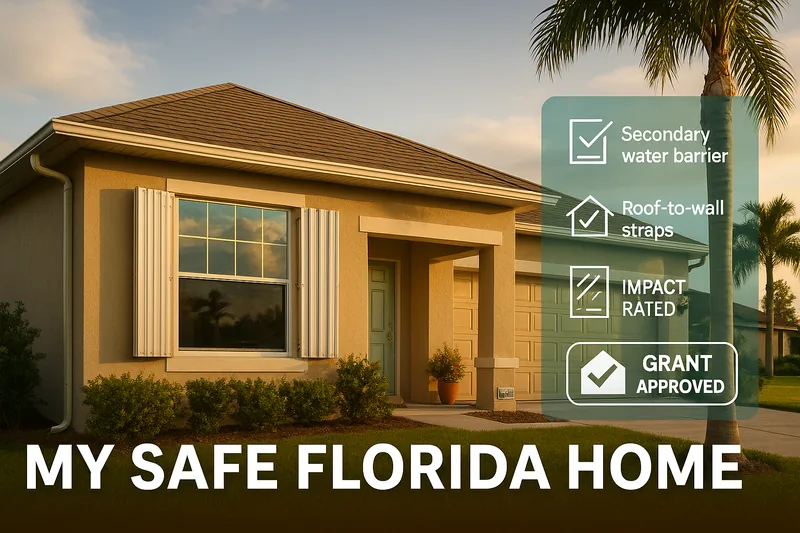
• Roof system: covering condition, decking attachment, roof-to-wall connections, and secondary water barrier
• Openings: impact-rated windows, exterior doors, and garage door bracing/ratings
• Structure & geometry: roof shape, load paths, attachments, and other mitigation details
How to prepare
• Clear access to the attic, electrical panel, garage door, and all exterior doors/windows.
• Crate pets, unlock gates, and move vehicles for ladder access.
• Have recent permits, product approvals, and invoices handy if you’ve already done upgrades.
Your inspection report will rank improvements by impact and feasibility, helping you decide what to do first.
Grant Basics—Matching Rules & Maximums
• Matching path (most households): The state typically contributes $2 for every $1 you spend , up to $10,000 from the program.
• Low-income path: Qualifying low-income homeowners may receive enhanced support that reduces or eliminates the match on eligible projects.
• Approval before work: Don’t start work until your grant is approved and you understand documentation requirements.
• Reimbursement/direct pay: Expect to submit paid invoices, photos, permits, and final sign-offs to receive funds.
Pro tip: Ask your contractor to provide line-item estimates that map clearly to your grant-eligible scope.
Priority Groups & Timing—Plan Your Application
MSFH typically opens application windows in phases (e.g., seniors/low-income first, then additional groups). Since funds are limited:
• Apply early and finish each step promptly.
• If you land on a waitlist , keep your documents ready—funding replenishments can happen.
• Use your inspection report to pre-plan quotes so you can submit a complete grant application as soon as you’re eligible.
Which Upgrades Qualify—and Deliver the Most Value
Focus on improvements that meaningfully reduce wind intrusion and water damage:
• Impact-rated windows/doors/garage door (look for appropriate ratings and approvals)
• Roof system upgrades: improved roof coverings, roof-to-wall connections , decking attachment, and secondary water barrier
• Opening protection: code-compliant shutters or panels for windows, doors, and other openings
Maximize results by pairing upgrades: for example, an impact-rated garage door plus reinforced roof-to-wall connections often outperforms a single improvement done in isolation.
Step-by-Step Playbook (HowTo)
Step 1 — Create Your Account & Request the Free Inspection
Complete your profile, upload basic documents, and schedule your inspection. Confirm the day-of access plan (attic, garage, exterior).
Step 2 — Review Your Report & Prioritize Eligible Upgrades
Use the report’s recommendations to pick projects that deliver the biggest resilience gain and are grant-eligible . Shortlist two or three highest-impact items.
Step 3 — Collect Estimates & Submit the Grant Application
Request apples-to-apples quotes from licensed, insured contractors. Ensure each estimate lists product specifications, approvals, permits, and timelines. Submit your application with the selected estimate(s).
Step 4 — Complete Approved Work (Permits, Photos, Invoices)
After approval, schedule the job. Save before/during/after photos , paid-in-full invoices , permit records, and product labels or NOAs as required.
Step 5 — Final Inspection & Reimbursement/Closeout
Once work is finished, complete any required final inspection or documentation steps. Submit your draw request or reimbursement package promptly to receive funds.
Insurance Savings—What to Know
• Many improvements may qualify for wind-mitigation credits on your policy.
• Keep a tidy folder with your inspection reports, permits, photos, and invoices to share at renewal.
• Ask your agent what proof they need to apply the appropriate credits.
Pro tip: Schedule a quick check-in with your agent once upgrades are complete; don’t wait until your renewal notice arrives.
Budgeting & Choosing Contractors
• Verify license & insurance and ask for recent, local references.
• Request detailed scopes with model numbers and product approvals.
• Clarify lead times and schedule around storm season when possible.
• Compare warranties (materials and labor) and confirm who handles permits and inspections.
• For larger scopes, consider a phased plan that still meets the program’s rules and deadlines.
Common Mistakes to Avoid
• Starting work before grant approval
• Using products that don’t meet required standards or lack documentation
• Skipping permits/final inspections
• Submitting incomplete reimbursement packages (missing photos, invoices, or proof of payment)
Avoiding these pitfalls keeps your timeline smooth and your funding on track.
FAQs
How much funding can I receive? Eligible homeowners can qualify for matching grant funds up to $10,000 for approved wind-mitigation improvements. Specific match requirements depend on your pathway.
Do I have to match the funds? Most applicants contribute a portion of the project cost under the matching path. Qualifying low-income homeowners may access reduced or no match on eligible projects.
How long does the process take? Timelines vary by funding cycles, contractor availability, permits, and your responsiveness with documents. Applying early and submitting complete packets speeds things up.
Can condos apply? MSFH primarily focuses on single-family homes and certain townhomes. Condominium associations may have a separate mitigation program; check current eligibility details.
What upgrades usually move the needle most? Impact-rated openings (including the garage door ), improved roof attachments, and secondary water barriers commonly deliver strong resilience gains.
Conclusion
The path is straightforward: get the free inspection , use the report to prioritize high-impact upgrades , apply for the matching grant , and close out with clean documentation. You’ll strengthen your home against storms and may unlock valuable insurance credits—wins for your safety and your wallet.
Robert Jones Roofing
Website: https://www.robertjonesroofing.com/
Phone: (321) 403-5047
Email : info@robertjonesroofing.com
Google Reviews: https://maps.app.goo.gl/DhkJYwyBQHqaVVwk7